Using a property condition checklist doesn’t need to be a stale, tick‑the‑box chore. When done with focus and awareness, it becomes a powerful tool to catch potential problems before they spiral — from worn carpets to leaky faucets, and even early pest‑entry signals. The smartest approach treats the checklist as a live, sharp-eyed companion that guides you through every nook and cranny of your property.
Starting with Floors: More Than Just Looks
Floors often suffer the first wear-and-tear in any apartment. Dirt, scuffs, stains, or missing tiles might seem cosmetic at first — but they often point to bigger issues. For example, a cracked tile near a wall might hint at slow foundation shifts or recurring dampness pushing against the structure. A damp‑prone floor corner could also invite pests like silverfish or termites depending on the climate and building age.
When you walk on each floor, use the checklist to note any unevenness, discoloration, soft spots, or damp smells. Try to keep your notes specific: “north‑west corner under refrigerator shows slight bulging, floor squeaks under weight.” Vague markings like “floor looks okay” won’t help later. Documenting early saves you from having to replace entire floor sections later — and saves residents from surprises too.
Walls and Baseboards: Structural Integrity and Pest Barriers
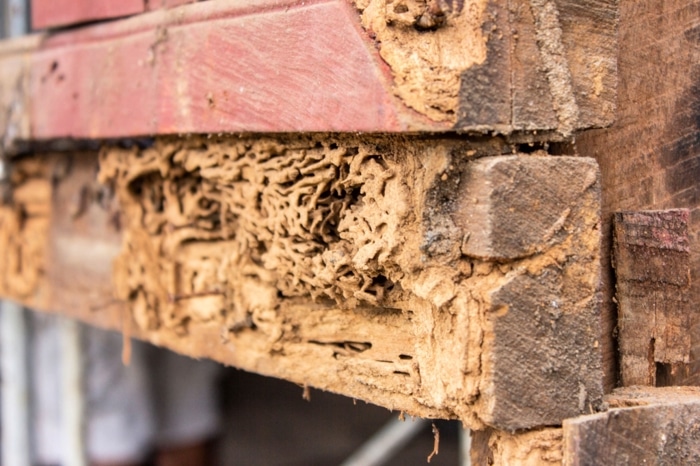
Walls may appear plain, but they tell stories. Paint peeling near the ceiling might mean excess humidity or a leak above. Cracks in drywall or plaster could suggest shifting frames or settling walls — a structural concern worth watching. Even more, gaps along baseboards or corners create welcome pathways for pests such as rodents, ants, or cockroaches to sneak inside.
While checking walls, test for firmness — gently press along corners, around door frames, and near windows. Note any soft spots, crumbling plaster, or suspicious gaps. If you see tiny holes or tunnels near baseboards, flag them immediately. These are early signals of pest intrusion or water damage. For pest‑sensitive properties, such notes can guide where to apply pest‑proofing or sealing before occupancy begins.
Plumbing and Faucets: Look for Leaks Before They Grow
Nothing kills resident satisfaction — or your budget — faster than a dripping faucet, a slow leak under the sink, or a running toilet. Water waste, mold, and hidden moisture can also create environments where pests thrive. Checking plumbing carefully is not optional.
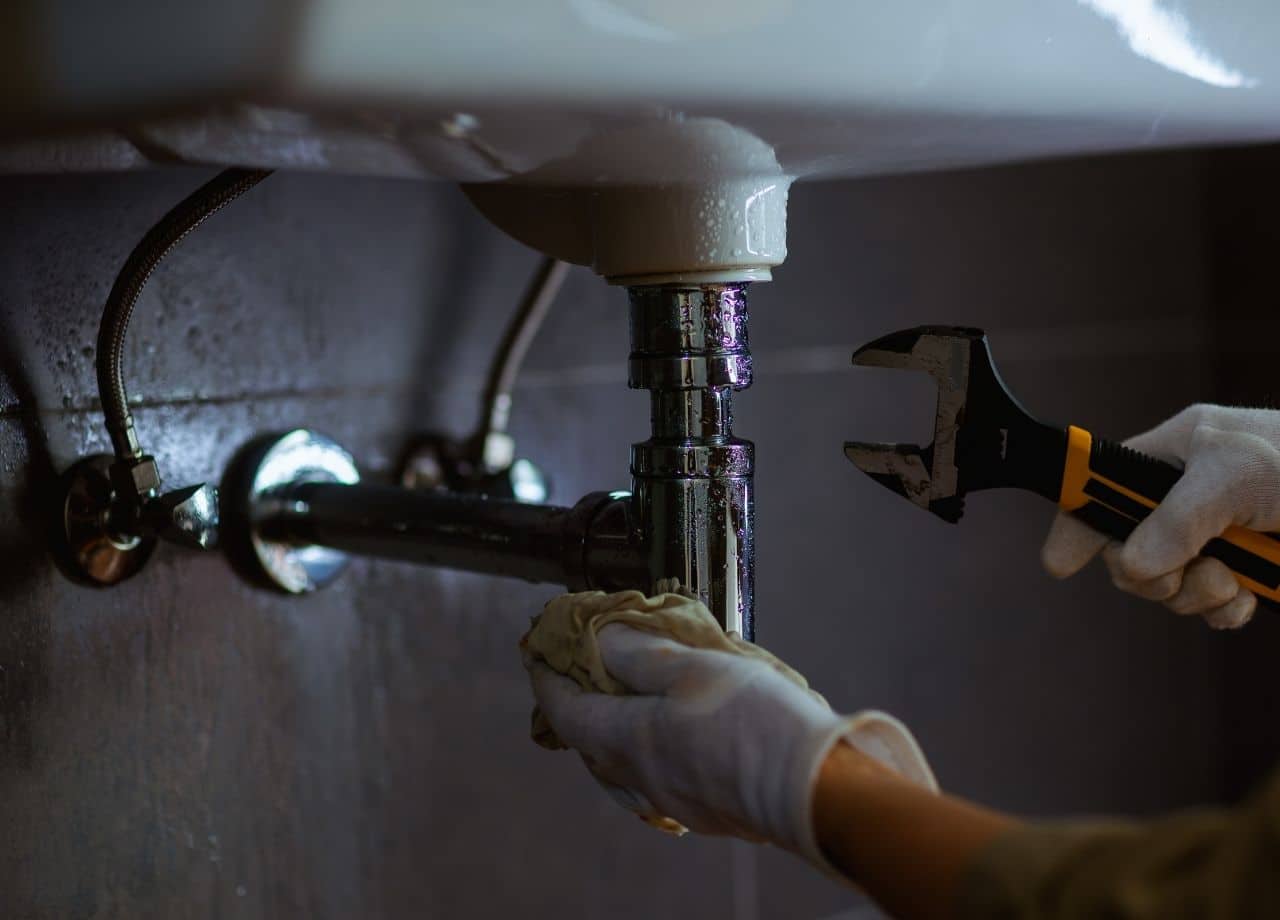
When using your checklist, run every faucet. Turn on hot and cold, letting water flow fully. Watch for drips when shut off, dampness under sinks, discoloration around caulk or grout, and odd smells signaling trapped moisture. Tighten loose fittings or mark fixtures for repair before a leak becomes a flood. Note if water pressure seems uneven — sometimes clogged pipes hide deeper corrosion or mineral build-up, signaling it’s time for professional plumbing maintenance.
Appliances and Fixtures: Confirm Safety and Functionality
Appliances and fixtures are more than convenience items — they affect resident comfort and property longevity. A refrigerator that doesn’t seal right can cause moisture build-up inside; a stove with faulty wiring becomes a fire hazard; a broken hood fan may let grease and odors linger, attracting pests.
Go through each apartment with your checklist and operate every appliance: oven, stove, fridge, dishwasher, garbage disposal, exhaust fans, air conditioning units, heaters. Listen for unusual noises, check that seals are tight, observe whether lights and ignition modules work properly. If a refrigerator door doesn’t close flush, note it; a stove burner that sputters requires immediate servicing. Catching these issues early reduces risk of costly breakdowns and avoids resident complaints down the road.
Windows, Doors, and Seals: Key Defense Lines
Windows and doors are often overlooked. But they serve as major defense points — against weather, drafts, and pests. Loose frames, cracked seals, broken locks, or gaps around thresholds all degrade safety, comfort, and efficiency.
As you inspect, open and close every door and window to confirm smooth operation. Check weather-stripping, locks, and alignment. Look for cracks in the frame or broken glass. On older buildings, especially where rodents or insects are common, gaps near windows or under doors are fast-track entry points. A detailed note on “window frame on east side, apartment 4B, seal separating 5 mm at bottom right corner” can give maintenance crews exactly what they need.
When and How Often You Should Use the Checklist
A property condition checklist isn’t a “one-and-done” tool. Done once at move-in and once at move-out leaves too much room for surprise problems. The smartest strategy is interval-based checks — semi‑annual or quarterly, depending on property age and resident turnover.
Also plan a checklist run after any extreme weather events: heavy rain, flooding, or cold snaps. These events can stress foundations, warp floors, crack walls, or trigger leaks. A quick thorough scan after storms helps you catch moisture or structural issues before they worsen. Make the checklist review part of routine rounds — not extra work. Over time, you build a baseline for each apartment so changes stand out clearly.
Why “Smarter” Checklists Matter for Pest Risk Prevention
A detailed condition checklist does more than prevent wear and tear — it acts as a first line of defense against pest infestations. Moisture build-up, structural gaps, damaged seals, and broken appliances all create hiding and entry spots for pests. When you mark these vulnerabilities as they appear, you gain the chance to act before a full-blown infestation.
For example, leaving a slow leak unchecked under a kitchen sink might go unnoticed until mold appears — but it may have already invited cockroaches or silverfish. Cracks near baseboards offer rodents a path into wall voids before anyone notices. By covering every floor, wall, plumbing, fixture, window, and appliance in your checklist, you reduce the chances of pest-friendly conditions. That makes follow-up prevention easier and less expensive.
Creating Specific, Actionable Notes — Not Vague Comments
One common mistake property managers make is writing vague comments like “kitchen okay” or “bathroom looks fine.” Such notes don’t help anyone later. Instead, treat your checklist like an audit log. Write entries like “south wall plaster crack 10 cm long, 3 mm wide, chipping starting” or “sink drain wet under cabinet — no mold yet.”

Use descriptive language about location (which apartment, which wall, which corner), severity (small crack, moderate gap, major leak), and type of issue (moisture, structural weakness, seal failure, appliance malfunction). These details help maintenance teams prioritize and fix problems systematically. They also give clarity when future inspections show changes, helping you track deterioration over time rather than trying to remember what was “okay last time.”
Empowering Residents — and Making Your Job Easier
When you carry out regular, thorough inspections with a solid checklist, you set a high standard for property upkeep. Residents appreciate quick responses to leaks or malfunctioning fixtures, and they are more likely to report small issues early because they see you already care. That makes your job easier in the long run.
You can even turn the checklist into a communication tool. If a resident reports a problem, you compare notes from the last inspection and check whether the issue is new or ongoing. That helps you differentiate between normal wear and resident damage. With clear records you reduce disputes, improve maintenance scheduling, and present a stronger case for responsible upkeep.
In properties where pests are a concern, the value rises even more. A well-kept apartment is less attractive to pests. And when you spot early signs — damp areas, cracks, leaks — you can coordinate with teams like Pest Share to apply prevention measures before the problem escalates. Regular checkpoints become part of a bigger strategy: safe, clean, well-maintained apartments tenants are proud to live in.
Maintaining the Checklist as a Living Document
A checklist is not a static piece of paper tucked away in a file. Treat it as a living document that evolves. As you discover new recurring issues — maybe a heater in one building frequently fails during cold snaps, or a certain apartment keeps showing moisture near windows — add custom lines to track those.
Customize the checklist with columns for date, inspector name, issue description, severity rating (minor, moderate, urgent), and follow-up action. That structure makes review easier and helps maintenance prioritize tasks based on urgency. Over time you build a practical database of issues that previously may have gone under the radar.
Consistency Pays Off — Early Fixes Save Money and Stress
The real strength of this smarter checklist approach becomes obvious over time. Early detection of small leaks can prevent water damage, mold, or structural rot. Noting loose tiles or cracked walls early prevents entire floor or wall repairs later. Catching old seals or faulty appliances before resident move-in avoids unexpected breakdowns or emergency calls.
Beyond financial savings, consistent maintenance builds your reputation as a reliable property manager. Residents feel confident their living space is cared for. Maintenance crews work more smoothly with clear, specific notes. And piston‑tight closures around windows, doors, and plumbing mean fewer opportunities for pests to find a home.
The smartest property managers don’t wait for problems to show up. They use the condition checklist proactively — inspecting floors, walls, faucets, fixtures, appliances, windows, doors, and seals. They create detailed notes, track issues over time, and take timely action. They treat the checklist as a living tool — not a static form. That approach keeps apartments safer, cleaner, and more welcoming.
That is a smarter way to use a property condition checklist.